We started with a paper pattern.
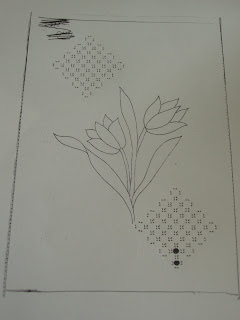 You will notice the lines around the design. These mark out the final size of the card, the dotted line on the left being the fold line.
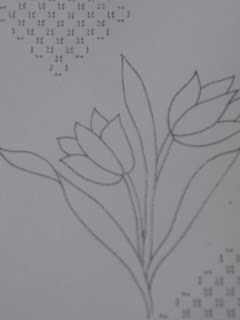
We traced the outline of the flowers and the leaves using a white pen.
 We then turned our attention to the corner patterns. Each of those dots had to be pricked. For the groups of four, we used a four pronged pricking tool, making sure we had a pricking mat under the paper. This stops the table or the tools being damaged.
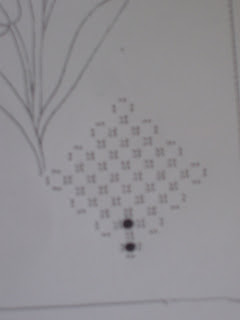
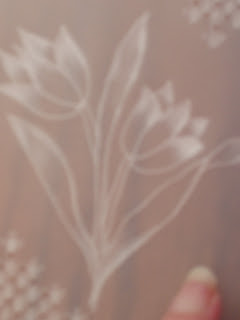
Once all the holes had been pricked, we removed the parchment from the paper. The parchment was then turned to the reverse side. After wiping with a tumble dryer sheet, to make the surface greasy, we were ready to "colour" the petals and leaves.
We used special embossing tools that had rounded points on the end. These came in a variety of sizes and we used the biggest one first. Staying within the traced lines, we stroked the parchment. This warms and stretches the parchment which gives it the white colour. The thinner tool gives definition to the shading.
In the corner sections, we used the larger embossing tool to make the white dots between each four square. Once this was done, the cut outs were the next thing to do.
Using special pergamano scissors, which have curved blade we form this small crosses. On each four dot block, we work one side at a time, putting the tips of the blades in two holes, slight twist to the left and snip. By doing this on all four sides, you get left with the cross shape hole.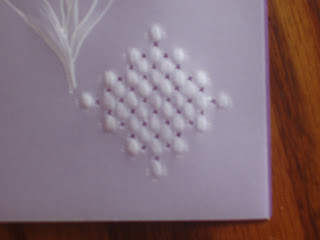
When the design is complete, the parchment is folded along the dotted line and then cut to size.
Taking some folded card, a strip of double sided tape is stuck on the reverse side along the fold. Place the card inside the folded parchment and join together, making sure the tape is on the reverse of the parchment. The card can now be cut to the size of the parchment. You should now have a pretty card.
Deepa, I hope this helps to give some idea of the process.
5 comments:
You will love this...you can also prick around the card border and then just pull the bottom away and you get a pretty scalloped edge all the way around...or prick around butterfly wings etc and make a 3-d card.
I loved this and made a lot of money for a cancer charity through selling the cards, it is just too time consuming for me at the mo.
Thank you,Jane.This is absolutely new to me.I'll have to find about the tools used too.
Hugs,
Deepa
Thank you so much for sharing this wonderful tutorial!
What an interesting post. Thank you for sharing the process. You are really talented and artistic.
Wow. That is absolutely fabulous -- what a neat process!
Post a Comment